Installing drywall is a challenging task requiring practice and patience to get it just right. The goal is to make the joints disappear, resulting in smooth walls and ceilings. There are two types of joints you will work with during this process – tapered joints and butt joints.
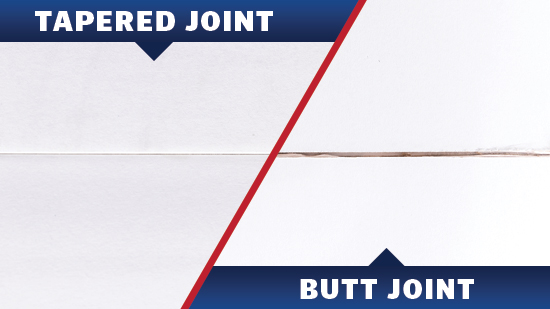
Drywall Joint Types
Tapered Joints: This type of joint is when the longer sides of drywall are brought together. These edges are thinner than the rest of the sheet of drywall, which results in a recessed area. These are a breeze to tape – fill in with tape and layers of mud in the recessed area until you have a smooth, flat surface.
Butt Joints: This type of joint is when the cut edges of drywall are brought together, resulting in a joint that is the same thickness as the rest of the panel. Butt joints have no recess, so you have to build up a layer of mud that's thin enough and wide enough to blend into the surrounding flat surface without creating a mound.
Getting those butt joints as smooth as possible is tricky to do, but this guide will walk you through the tools you need and the steps to follow so you can finish them like a professional.
Step 1: Prep the Drywall Compound
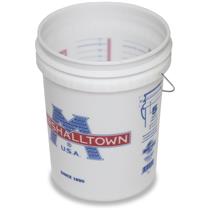
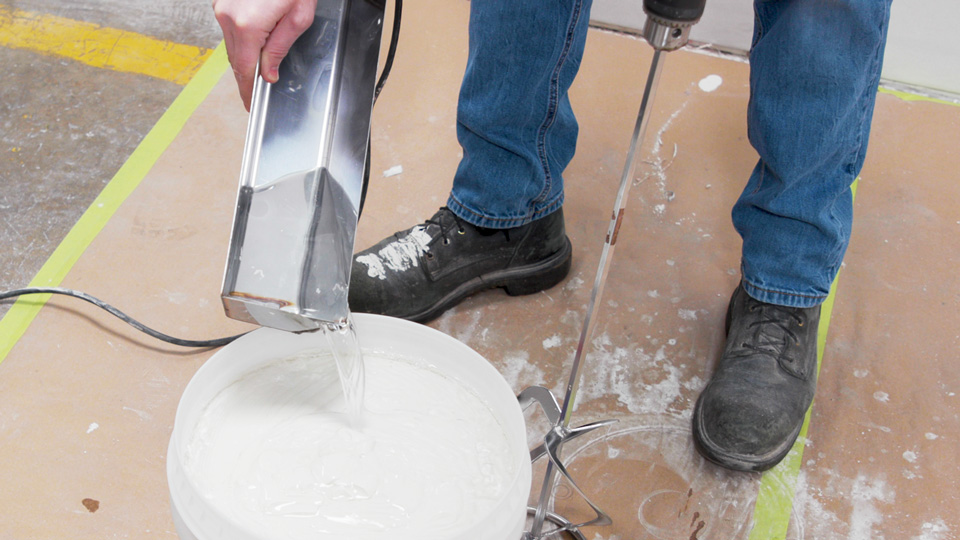
The cover up process begins once the tape has been applied and is dry. Before applying the drywall compound, you must mix it thoroughly with water to get it to the right consistency. In a MARSHALLTOWN 5-Gallon Bucket, mix the drywall compound using a MARSHALLTOWN Ribbon Mixer. This removes unwanted air bubbles, allowing the compound to spread out evenly.
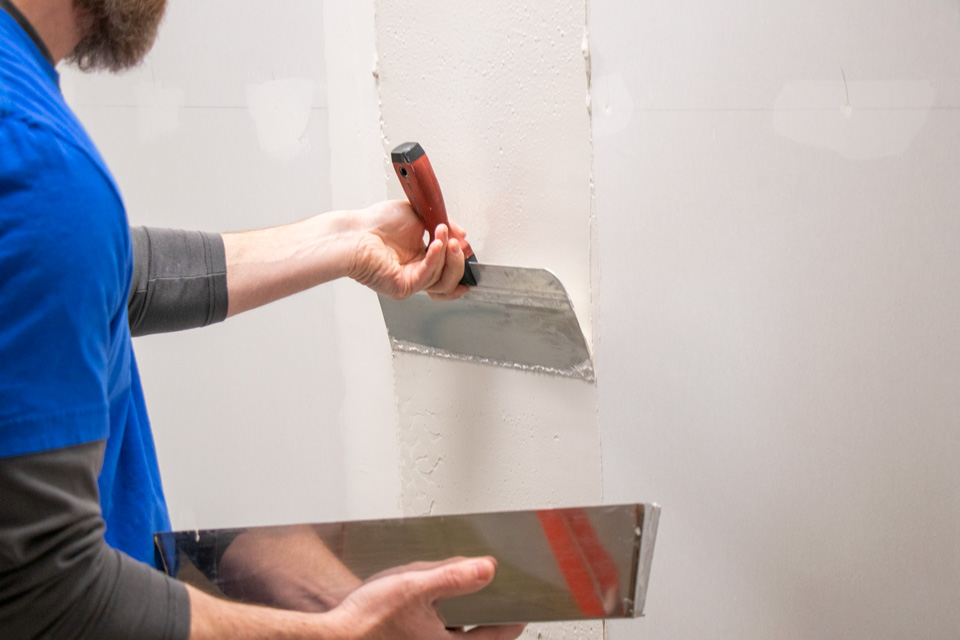
To get an idea of where to add compound, place a taping knife over the tape and onto the wall to see the voids that need filled.
Step 2: Apply Drywall Compound Over the Taped Joint
The next step is to apply a layer of drywall compound over the taped joint. Use a MARSHALLTOWN medium-width Taping Knife to spread out the compound, filling in the voids. Remove any excess compound so it is smooth and flat.
Step 3: Apply the Final Coat of Drywall Compound
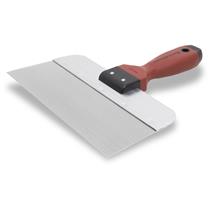
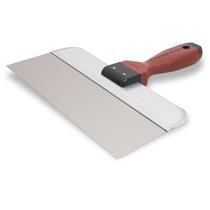
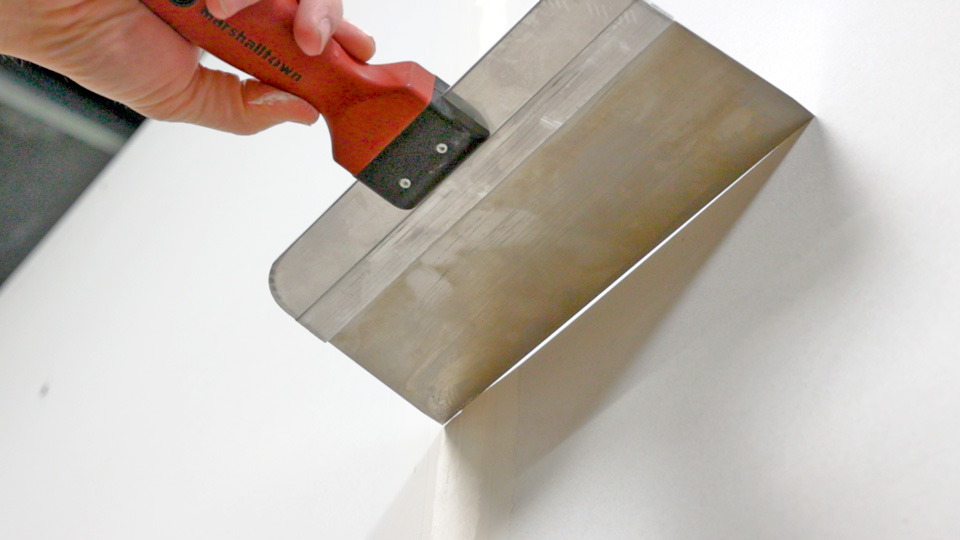
Allow the compound to dry, and then knock off any leftover compound that is sticking up. Choose a wider taping knife, like the MARSHALLTOWN 12" DuraSoft® I Taping Knife and apply the final coat of drywall compound over the joint, feathering the edges out at least 12 inches on both sides. Smooth out the joint to get it as flat as possible.

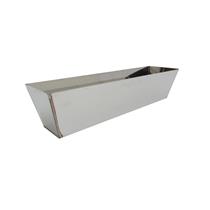
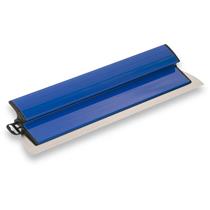
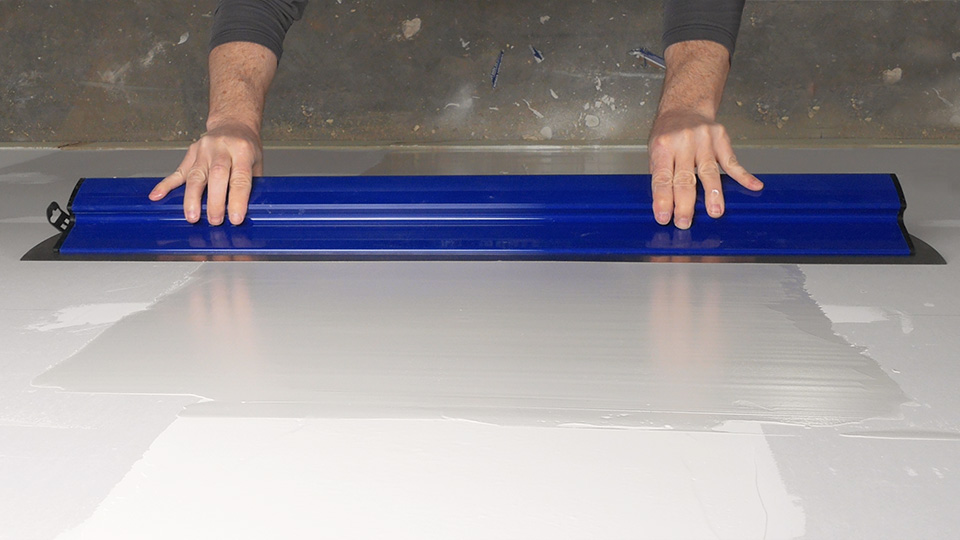
For a professional finish, grab your MARSHALLTOWN ProSkim®. This skimming blade comes in widths from 12" to 48" — for this project we are using the 24" blade. The ProSkim® has a thin, flexible blade to float over the joint and just the right amount of flex for feathering out the compound. To use the ProSkim®, start at the top of the wall and apply even pressure while pulling the blade downward. Then, remove excess compound from the blade. If necessary, repeat the same motion again until the joint feathers out on both sides, but make sure you don't remove too much compound. When done correctly, the wall should look almost ready to paint.
Step 4: Sand the Joint Smooth
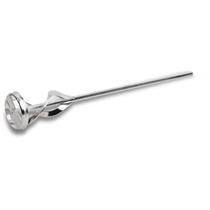
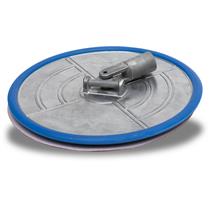
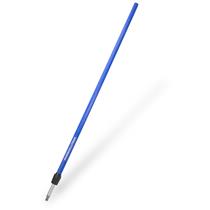
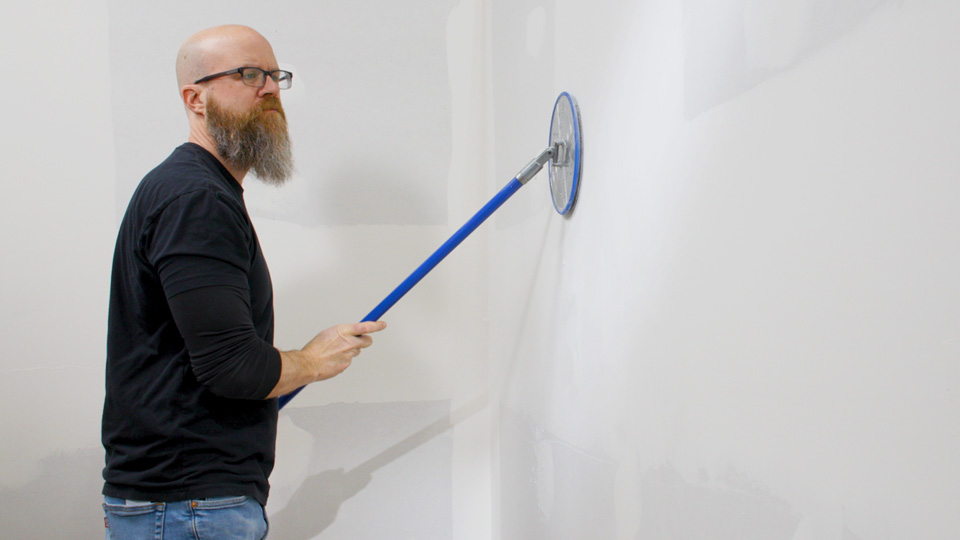
The final step is to lightly sand the joint so it's smooth. The MARSHALLTOWN Radial Pole Sander and Extension Pole will help. The wide sanding head of the radial pole sander is easy to control and won't flip, therefore reducing any chance of gouging your wall. The extension pole makes it easy to reach high spots while providing you with enough leverage. Once the joint is smooth and flat, your wall is ready to be primed and painted.
One way to see the high and low spots is to spray a light coat of dark spray paint over the joint. As you sand, the low spots will be revealed by the paint left behind. Sand until the paint disappears. If there are too many low spots, don't keep sanding. Reapply a light second coat of compound and sand again.
Finishing drywall butt joints may be the most challenging part of drywall installation, but by following these steps, using the right tools, and being patient, you can achieve professional-looking results!