In this three-part series you will learn how to build a form, mix and pour the concrete, and then stain and finish the tops to protect them.
Building a concrete countertop is a great way to spice up your outdoor firepit. These can be made to fit custom shapes, and you can stain the tops a variety of colors by using dye to tint the concrete. They are weather-resistant and are the perfect exterior project.
Part one goes through the five steps to building the forms for your countertop.
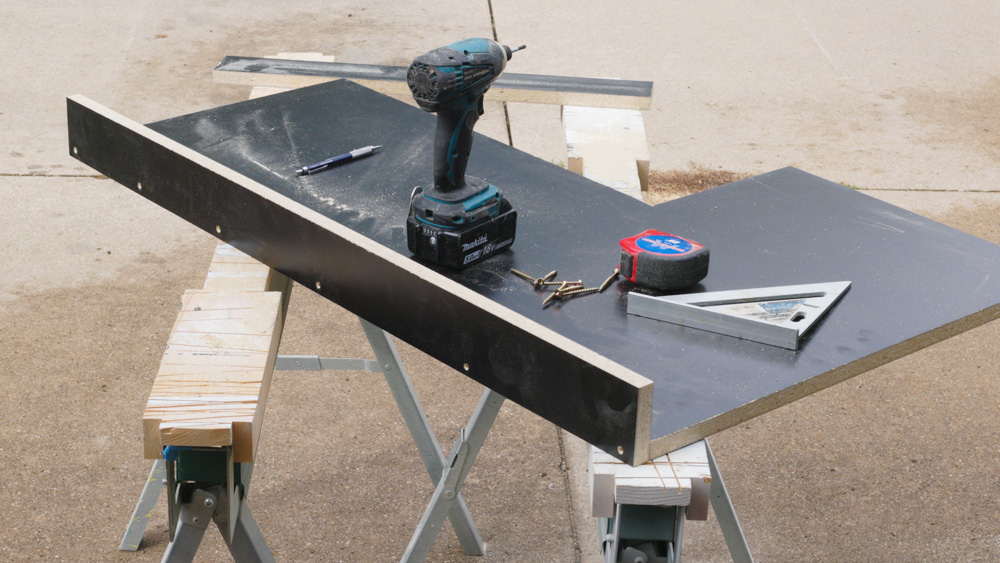
Step 1: Cut the Bases
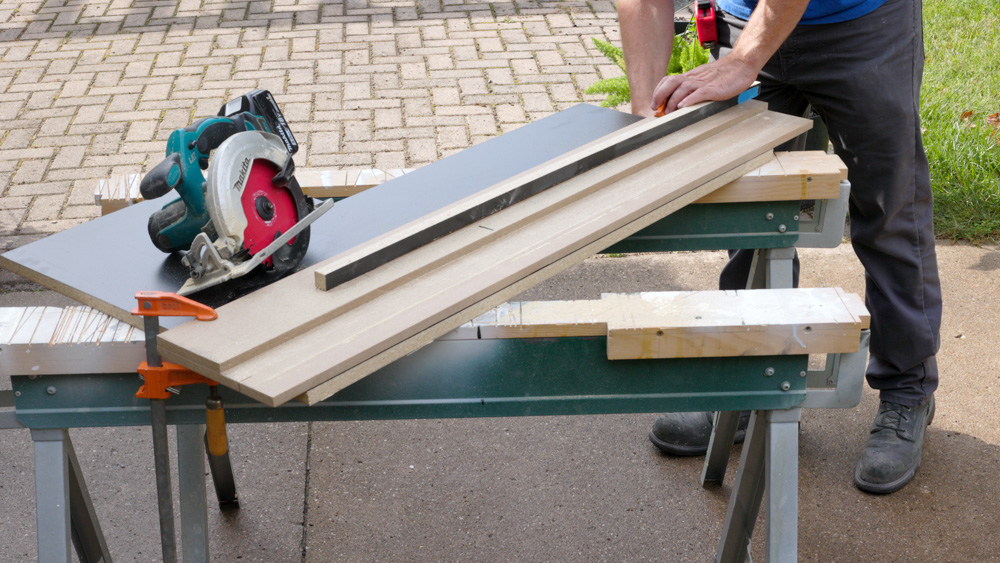
Use a circular saw with a straightedge clamped in place to cut the base parts to size. We used 3/4" Melamine particleboard for the form because it will not stick to the concrete.


If you are using a set of sawhorses, add a couple of wooden strips to the tops before you cut with the circular saw. This allows the saw blade to protrude through the cut into the wooden strip, making your job easier and protecting the sawhorses and saw blade from damage.
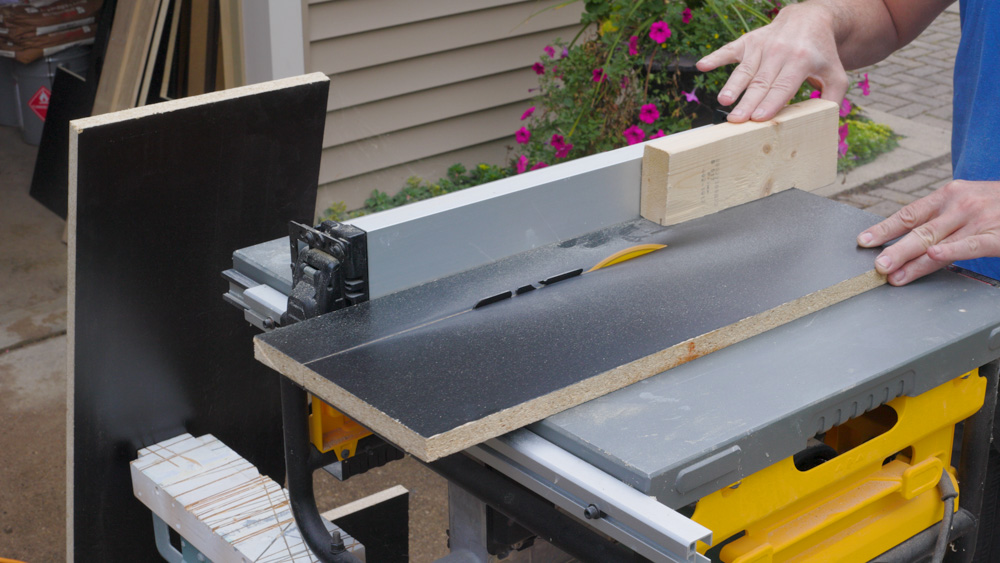
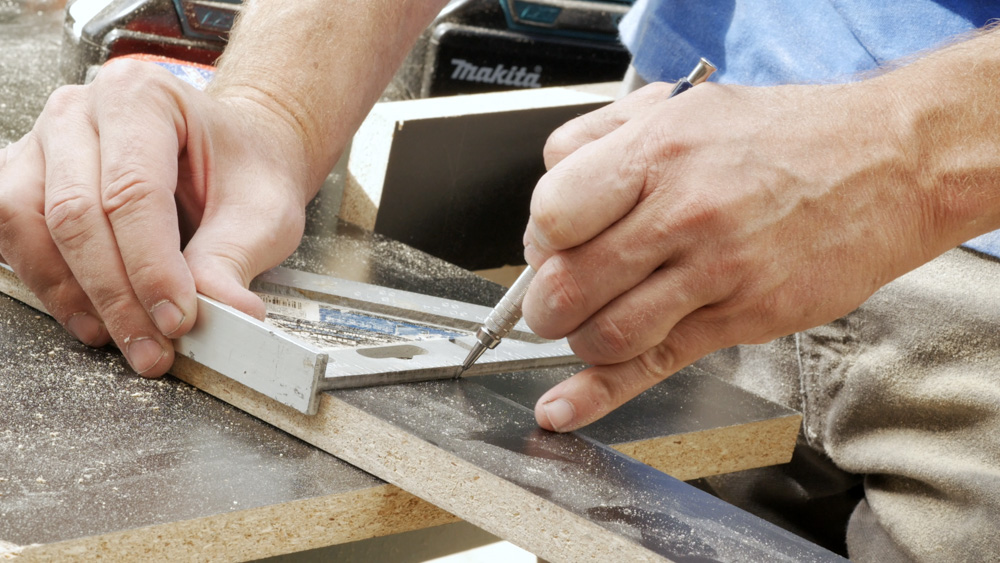
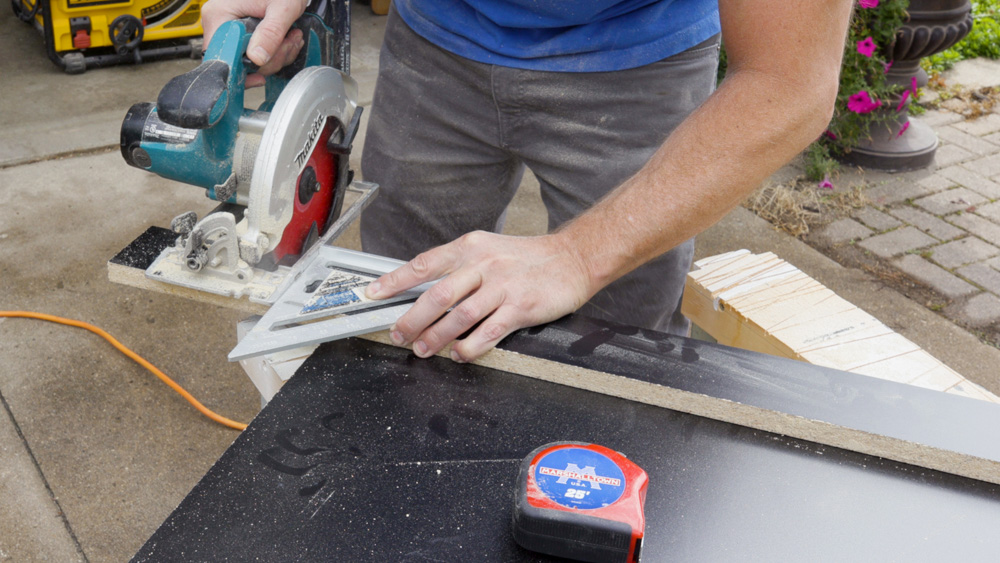
Step 2: Rip and Crosscut the Sides
Use a table saw to rip the sides to width. A table saw will ensure a consistent width across all pieces. The width is determined by the thickness of the top. Most tops are around 1-1/2” thick. Add 3/4" to the finished width to allow for the thickness of the base. Make sure to use a push block while ripping since the strips are narrow. Then, measure and mark the length of each side piece and crosscut them to length. Use a circular saw with a rafter square to keep the cut square. You can also use a miter saw to make the cuts.
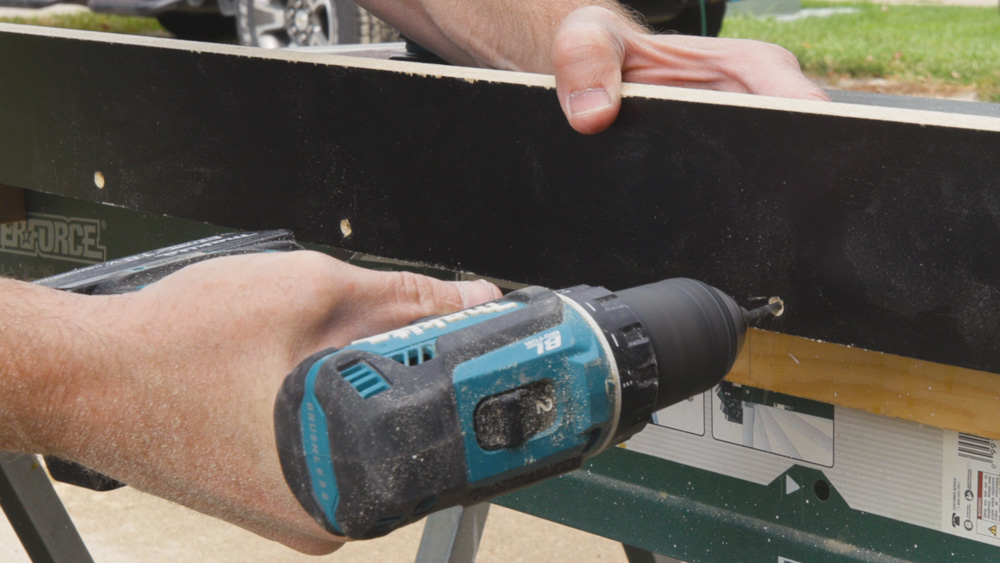
Step 3: Attach the Sides
Pre-drill countersunk shank holes for the screws in the sides before you install them. This will make the sides screw up tight against the base. Position the first side next to the base, keeping the ends flush with the base. Pre-drill pilot holes through the countersunk holes and into the base. This will keep the base from splitting. Drive #8 x 2” screws to secure the sides to the base.
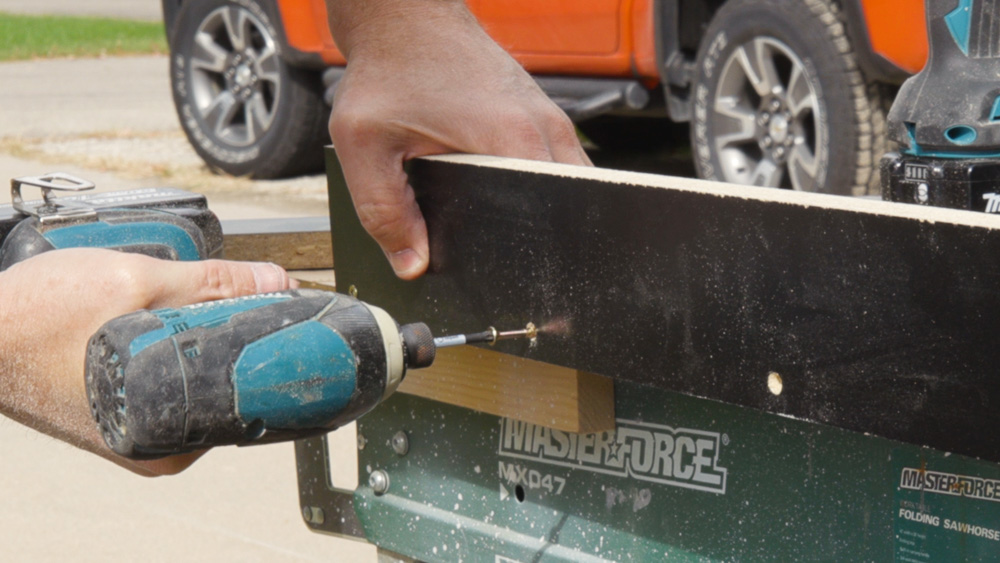
If you need a second hand to hold a part in place, clamp a scrap piece of Melamine under the base with the ends sticking out in both directions. This provides support to position the sides while securing them in place.
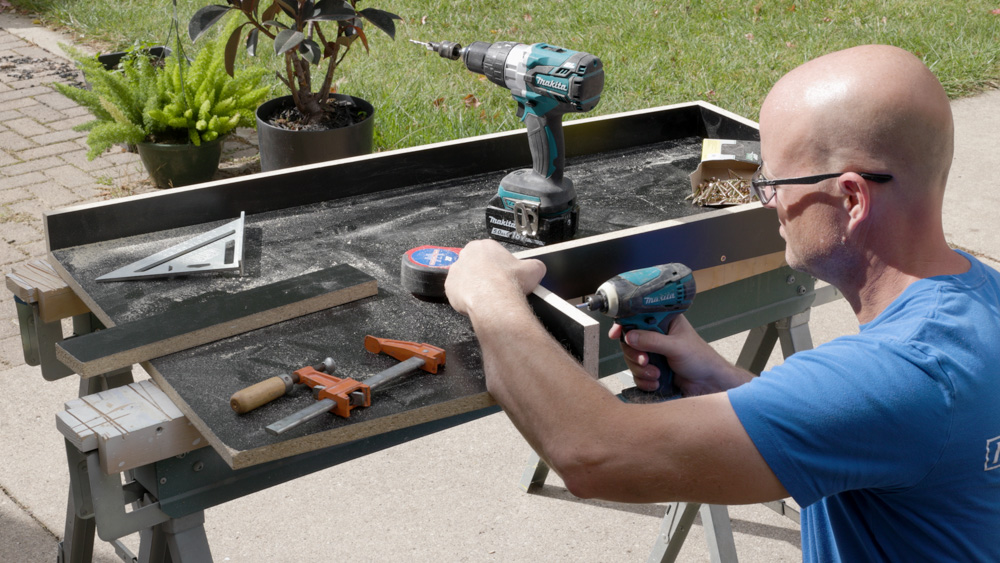
Step 4: Finish Assembling the Form
Repeat step 3 to attach the remaining pieces to the base.
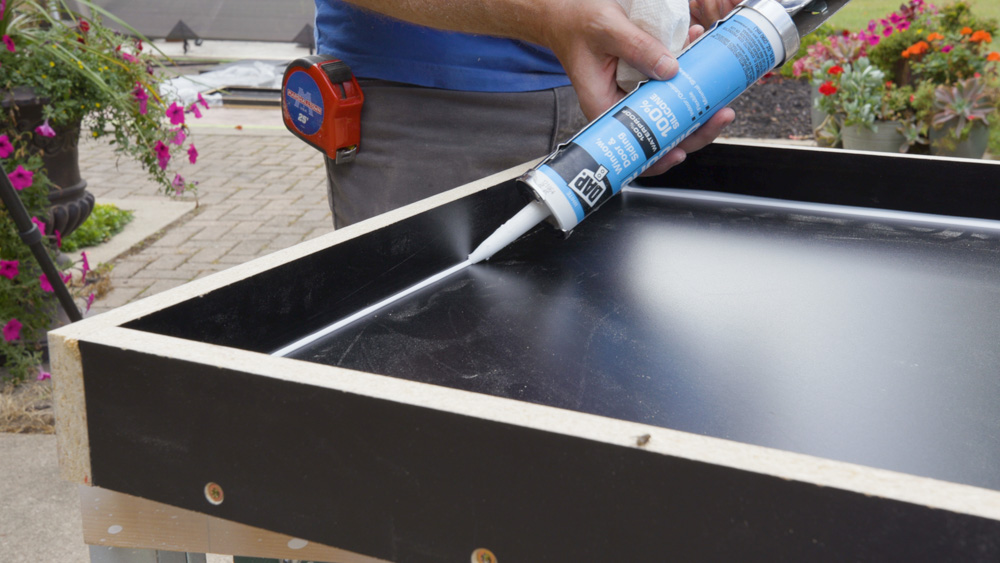
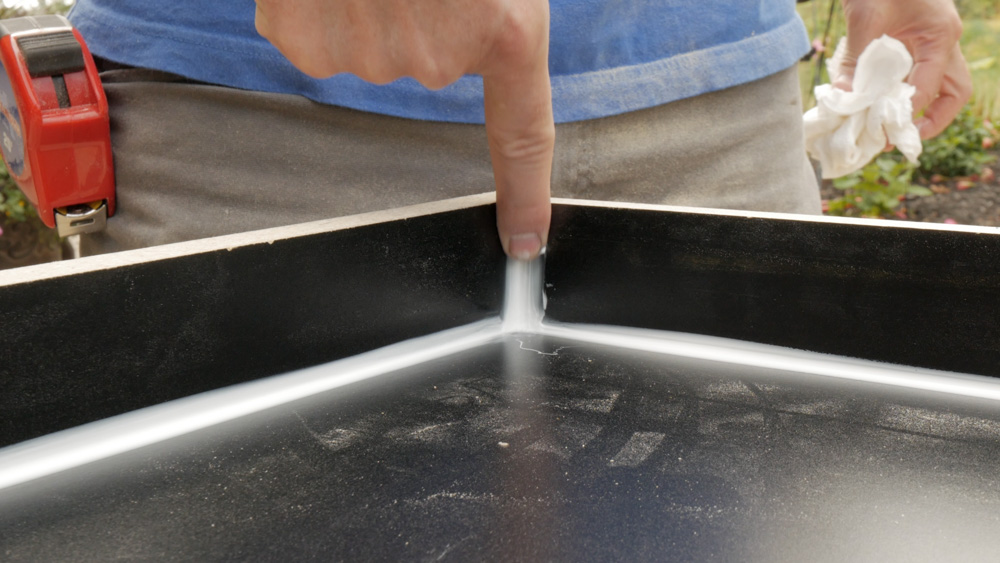
Step 5: Caulk the Inside Corners
Apply caulk to all inside corners. Then run your finger across the edges to make a smooth corner. This will give the top of your countertop a smooth, rounded edge when it is finished. Make sure to let the caulk dry overnight.
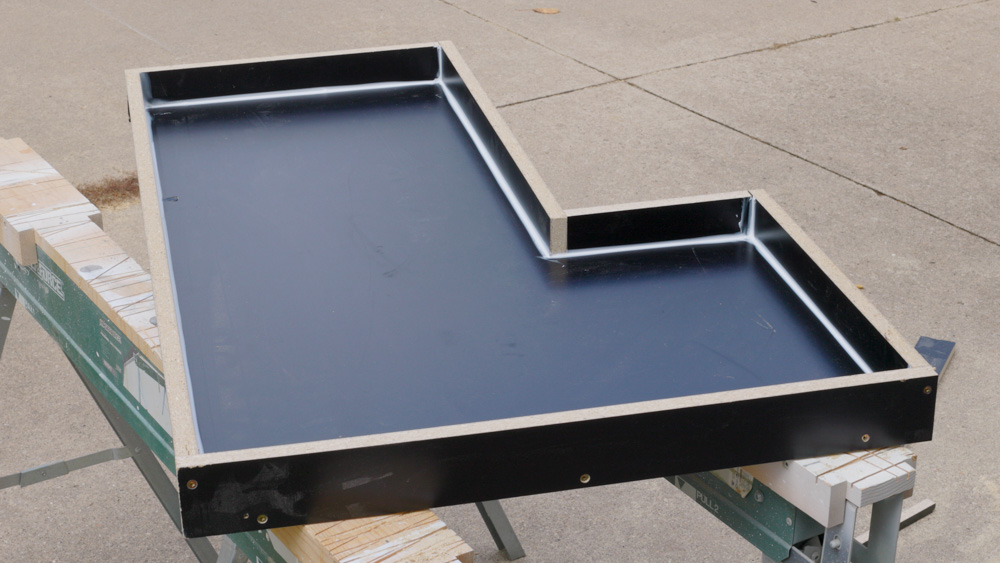
Now that your forms are built, it’s time to add the reinforcing, mix the concrete, and pour it into the forms!